 |
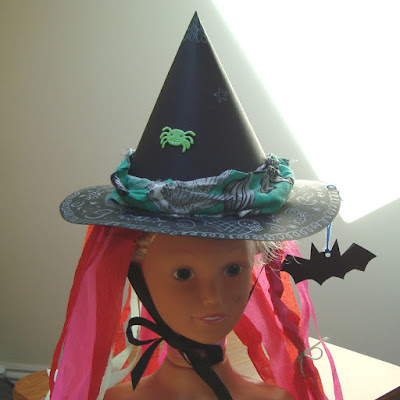
| My daughter's hairstyling doll wearing a finished witch's hat. The doll's head is probably similar in size to that of an 8-9 year old child but, because it ties on, the hat can be worn by older ages including adults. |
A few days before Halloween I will be leading a craft session for a group of children and teenagers and have made witches hats for them to decorate. I'm writing this blog post because, though I found a lot of information about making a witch's hat online, I couldn't find a quick and cheap way of producing them - important when you need to make twelve and are on a budget. Also, because I made the hats in advance I needed a design that would fit everyone up to and including those with adult sized heads. So I came up with my own version of a witch's hat based on what I saw in various blogs.
Making a witch's hat
Materials used to make each witch's hat:
2 sheets of A3 (297mm x 420mm) 220gsm (reasonably sturdy) matte black card
Double sided tape
PVA glue
Two lengths of 500mm ribbon (for ties)
Plus an HB pencil, a craft knife, a stapler, scissors, a compass and a ruler
 |
| The template for the cone of the witch's hat sitting on a sheet of A3 card waiting to be traced. It would be possible to make a taller hat but bear in mind this would have an impact on the circumference of the base if you are trying to fit within an A3 sheet. |
The radius of my cone template is 215mm. To create a similar cone place the point of your compass on the bottom edge of the sheet 215mm in from the left edge, start your line on the lower left corner and keep going until you hit the right side of the sheet, then draw a straight line between that point and where the compass point had been.
Cut out your cone using a craft knife or scissors.
To make a brim for the hat use a radius of 88mm for the inner circle, the radius of the outer circle is around 148mm to fit within the width of an A3 sheet (297mm). To find the centre of your sheet of card draw diagonals from the corners that cross in the middle.
Once you've cut out your brim(s) bend your cone(s) into shape.
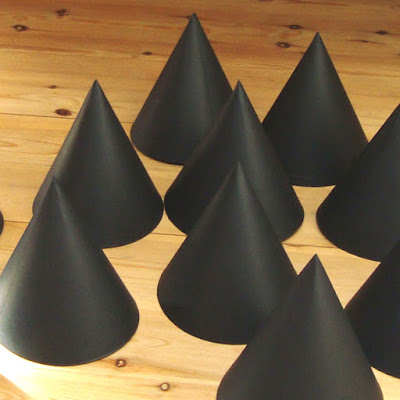 |
| Some of the witch's hat cones I made. |
Overlap the two straight edges of your cone by about 10mm at the base (because of the shape it won't overlap at the point but the overlap will gradually widen to the base). Secure the cones with double sided tape and a line of tape on the inside. If you are using thick card I recommend bending it into a tight cone a few times before taping it together so that it holds the shape well.
Next use a stapler to add ribbon ties either side of the hat to secure it to the wearers head.
I used pink ribbon because I happened to have a roll of it but you can use any colour you like. Attach a 500mm length on either side of the inside of each hat, with the smooth side of the staples facing inwards (to avoid catching on the wearer's hair) and at least 15mm up from the bottom edge.
Make scissor cuts all the way round the bottom edge of the cone roughly 15mm deep and 15mm apart.
 |
| The cutting measurements are for guidance, it's fine if the tabs are uneven - they'll be hidden by the brim. |
After cutting the tabs on the bottom edge of the brim fold them outwards. Test that the brim fits the cone. Some of my hats were a tight fit but once the edge of the brim was softened with glue I was able to squidge them together. However you can enlarge the inner circle if necessary. Don't worry if there is a gap because the inner circle of the brim is a bit too big, it will be covered by a hat band later. The most important thing is that there is enough of an overlap between the tabs and the brim to be able to glue them together.
Next tuck the ribbon ties inside the hat and secure them out of the way with tape so they don't get covered in glue.
Run a line of glue along the top side of the tabs at the base of the cone.
Slide the brim over the cone on to the line of glue and leave to dry.
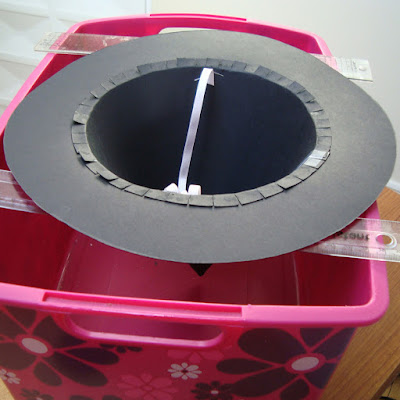 |
| A witch's hat on a drying rack made out of a storage box and two rulers. I found that I needed to keep pressing the tabs down as the hat dried, you can see here that they had a tendency to pop up. |
When the hat is dry unstick the ribbons so they hang down and you are ready to decorate.
 |
| The staples and any rough edges on the join between the cone and the brim will be covered later by decoration. |
Halloween workshop - decorating a witch's hat
Materials used:
White pencil or crayon
Black card left over from the construction of the witch's hat
Wool
Crepe paper
Scrap fabric
Halloween stickers
Also scissors or a craft knife, a hole punch, glue and double sided tape
I used an ordinary white pencil to draw on the brim of the hat, I doodled little Halloween themed drawings such as spider webs and skulls but creating textures or writing would also look good. It is possible to draw on the cone as long as you support it from the inside with your hand as you draw.
 |
| The card I used for the witches hats had a matte surface that took white pencil very well. |
Using scrap left over from the construction of the hat I cut out a little bat to dangle from the brim.
 |
| Here is a bat but spiders and skulls would also look good. |
I made a hole in the brim and the bat using a hole punch and hung the the bat from the hat on a length of wool.
Then I made some hair.
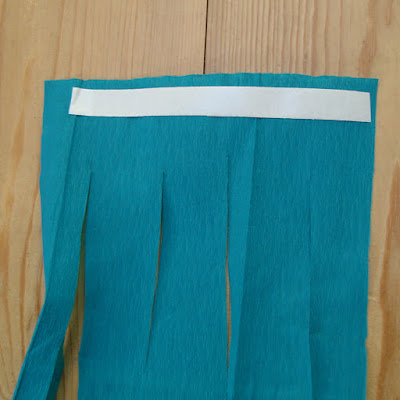 |
| I bought a packet of crepe paper that had nine different colours. |
The easiest way I found to make the crepe paper hair was to use fairly small segments (120mm - 150mm wide) and to build up the hair bit by bit starting from one of the ribbon ties and ending at the other. Each crepe paper segment was cut into strips that ended around 30mm from the top edge and a strip of double sided tape to attach it to the hat.
 |
| Crepe paper hair in a variety of colours. |
I plaited some segments together and tied them with lengths of wool. Then I created a hat band out of scrap material (crepe paper could be used instead) and stuck it to the hat with a couple of pieces of double sided tape. A final touch was a Halloween spider sticker.


